


Welcome to the Blog
Explore Blog Posts that showcase our work, our values, and our team
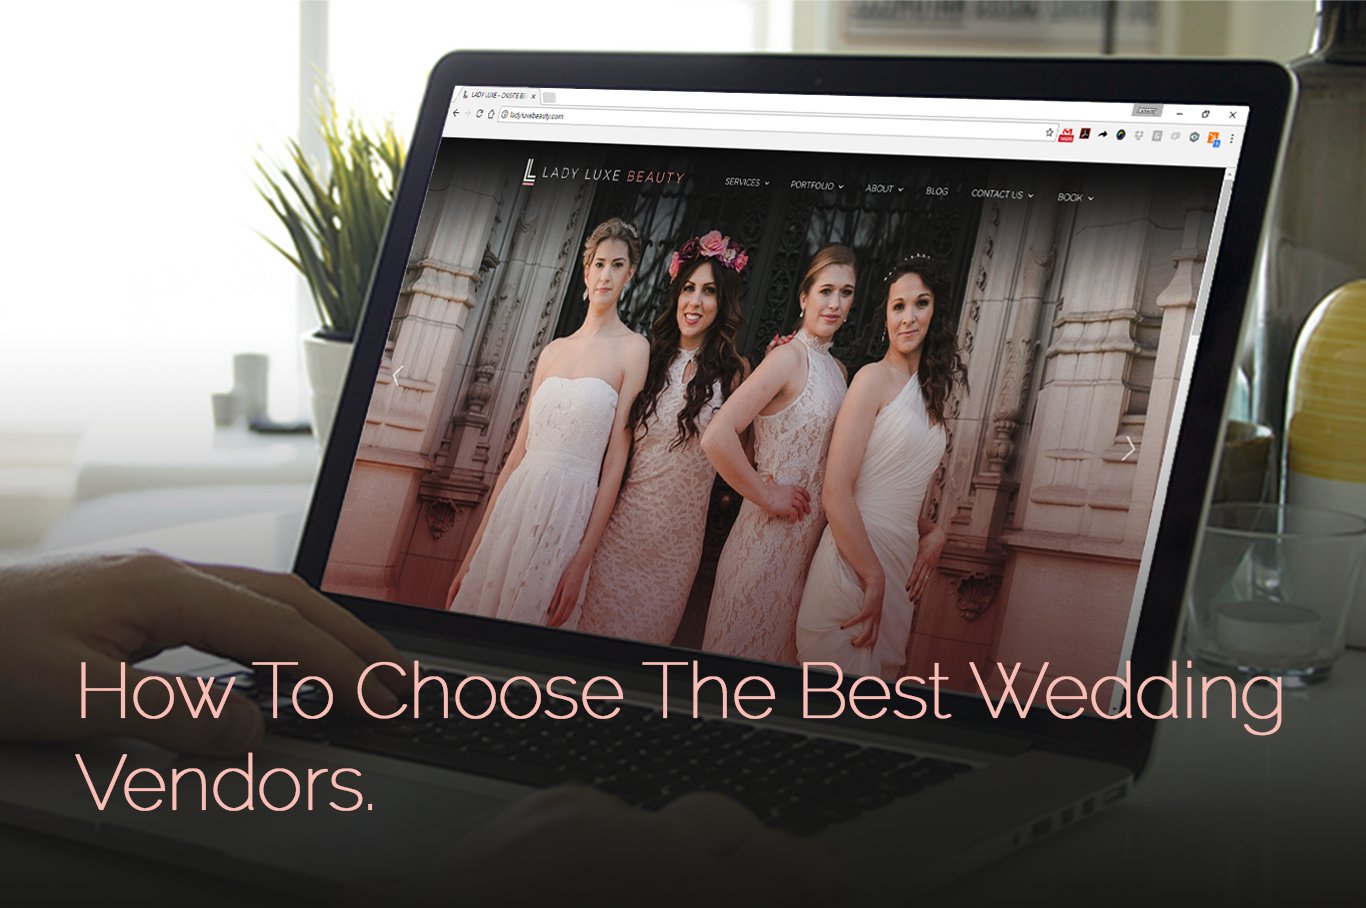
Choosing the right wedding vendors is essential to pulling off an amazing wedding. Vendors are your foundation and the experts who will transform your vision into reality. It’s important to do your research and find out who is the best fit based on personality, budget, and overall vision. Let’s face it though; figuring out which vendor is best is downright intimidating. You may be asking yourself, “Where do I even begin?” Finding wedding vendors is a lot like modern dating; it takes patience, research, self-awareness, and time.
First, let’s talk budget. We all have one—big or small—and it is important to stick to it. Research and choose vendors in your price range. You do not want to have champagne taste on a beer budget. Exceeding your budget only leads to headaches and heartache. Map out which vendors you are interested in hiring: Photographer, Videographer, Flowers, Band, etc. Stick to what is essential; foregoing the unnecessary will give you a better allowance for what you find most important.
Next, let’s talk expectations. Knowing what you expect from a vendor will help you weigh your options. Do you have a specific vision for the food? Are you set on having a photographer who includes a photo album? Dietary or religious concerns? Each couple has their own set of expectations and even though it may seem silly, it is smart to write those down alongside your budget to help you properly map your wedding out.
Research!! In this modern day, you can find just about everything on the internet. Websites such as www.theknot.com and www.weddingwire.com are specifically designed to help you search based on location, budget, and reviews. My advice is to jot down 3 vendors for each category, and do further research. For example, find three florists that stand out the most to you and search them on Google, Facebook, Instagram, etc. These websites will show you visuals and reviews of each company’s work. Social media is huge these days so work it to your advantage and find the best vendor for you.
Most importantly, call and meet your chosen vendors. Our generation tends to hide behind a phone or computer screen, but it is so very important to have actual verbal communication! This will allow you to really get to know the vendor, understand the work they do, and even potentially see some tangible examples. Discuss what is most important to you and the non-negotiables. Map out your expectations and compare these with pricing. Inquire as to their contract and establish any additional fees. Lastly, choose a vendor that understands you and your vision. We are all on different wavelengths; choose a vendor that has a similar style and personality to your own.
You’ve done your research, found your favorite vendors, and interviewed each. Now it is time to ask yourself who had the best customer service? Who seemed the most reliable and detail oriented? Who’s pricing best aligned with your budget? Who was willing and able to meet all your expectations? Take the answers to those questions and evaluate your best fit. This decision process isn’t a science but it is certainly a task that should be done thoroughly. Best of luck!
read full post >
“What can I do to grow my hair longer?”
“How can I make my hair grow more quickly?”
“Are there any products I can use to help my hair grow?”
As a stylist, I find this is one of the most frequently discussed topics. The struggle is real! A lot of us ladies grew up on Disney movies such as Beauty & the Beast, Little Mermaid, and Rapunzel where women we admired had long, luscious locks. I mean, who didn’t dream of growing up to be a Disney princess? Hair style trends are constantly evolving and we watch celebrities change their hair like they change their outfits. Envy gets the best of us and we want that instant gratification that they are able to obtain! Unfortunately, these types of resources aren’t available to most of us but, whether you’re recovering from a bad haircut, your hair just doesn’t seem to grow, or you are just wanting to grow your hair longer, I have mapped out some helpful tips to help aid your process.
Your Health:
Your personal health is key! Getting proper rest at night, eating well, and drinking water are huge components of not only hair growth, but overall positive body development. Making smart, healthy decisions benefits us in more ways than we can count. Consuming foods high in vitamins, minerals and proteins will get you well on your way! Iron and zinc are said to help hair follicles grow and can be found in lean, red meat. Also, soybeans and lentils are rich in vitamin-c and boost iron absorption. Protein, one of the building blocks of life, is very important to consume because it supports cell growth and boosts hair strength! It is ideal for a woman to consume at least 46 grams a day. Eating fatty fish high in omegas 3’s can also help keep your hair hydrated while actually relieving depression and helping your heart.
Supplemental vitamins:
Who hasn’t seen the Instagram posts marketing “Sugarbearhair” vitamin gummies? Celebrities claim to use them so they must work, right? I can’t vouch for their validity, but I do know there are more vitamins than ever on the market for hair growth. One of my favorites is Biotin; a safe, natural vitamin for hair, skin, and nails. Also, a women’s daily vitamin is helpful for your hair and your overall health. Some women determined to grow their hair quickly have even deferred to prenatal vitamins. Several studies have found that vitamin D aids in hair growth. Excessive exposure to UV rays can be harmful, so it is best to take a 1,000 IU daily supplement instead. Not all supplements are treated equally; be sure to choose vitamins that are natural in origin and drug free.
Trims:
No, this is not a marketing ploy to get you to spend more money on haircuts. You really do need to “trim”/”dust” your hair every 8-10 weeks to avoid split ends. These split ends will only end up giving you the haircut you didn’t want. I can’t tell you how many clients of mine thank me profusely for getting them in for trims. “My hair is growing faster than ever, thank you so much for keeping me on track!”
Washing:
I could write a blog on this topic alone. A lot of people do not understand how to properly wash their hair. When you wash, shampoo should only be rubbed into your scalp. As you wash the suds away the ends will get the cleaning that they need. When you condition, start with your ends and only use the residual product near your roots. Using too much conditioner near your roots will only lead to an oily scalp and you needing to wash your hair more. Also, DO NOT OVER WASH. The more you wash, the more dry your hair will become, leaving your hair brittle and more prone to damage and breakage. Your hair needs the natural oils. Sounds gross, but the less you wash your hair the better. Aim to wash your hair no more than 3-4 times a week. Lastly, are you using a good shampoo and conditioner? Avoid shampoos with sulfates and other harmful ingredients. Stick to salon grade shampoos that protect your color (if you color your hair) and are suitable to your hair type.
Masks/Treatments:
Oh how I love masks! They smell delicious and make my hair feel SO good. One of my personal favorites is the Oribe “Gold Lust” Mask because it hydrates my hair without completely weighing it down. I am also a big proponent of Olaplex leave-in treatments. If I know I am going to wash my hair the next day, I rinse my hair the night before (do not wash), towel dry and apply the “Olaplex Hair Perfecter o. 3” from roots to ends. I actually sleep with the mask and shampoo and condition my hair the following morning. I always feel as if my hair is dramatically healthier, leaving it less susceptible to damage or breakage.
Hairstyling:
I know you don’t want to hear it, but limit how often you use hot tools. Your hair will thank you! A fantastic diet and every vitamin in the world will not help you if you are using an excessive amount of heat on your hair. I would recommend limiting the use of hot tools to 3-4 times a week max. Once your hair becomes healthier, it will look better natural. In fact, there are many YouTube tutorials out there to help you style your hair without the use of heat. Remember, when you do use heat, a heat protectant product is always your friend.
Unfortunately, there is no magical pill that will help your hair grow and extensions can be ridiculously expensive! Treat your hair and body well by staying hydrated, getting rest, eating well and consuming the proper nutrients. Don’t abuse your hair by washing incorrectly, using poor products, or heat-styling often. These tips may seem like no-brainers, but are you actually making sure you are doing them? Be patient and diligent and your hair will grow longer in no time!
read full post >
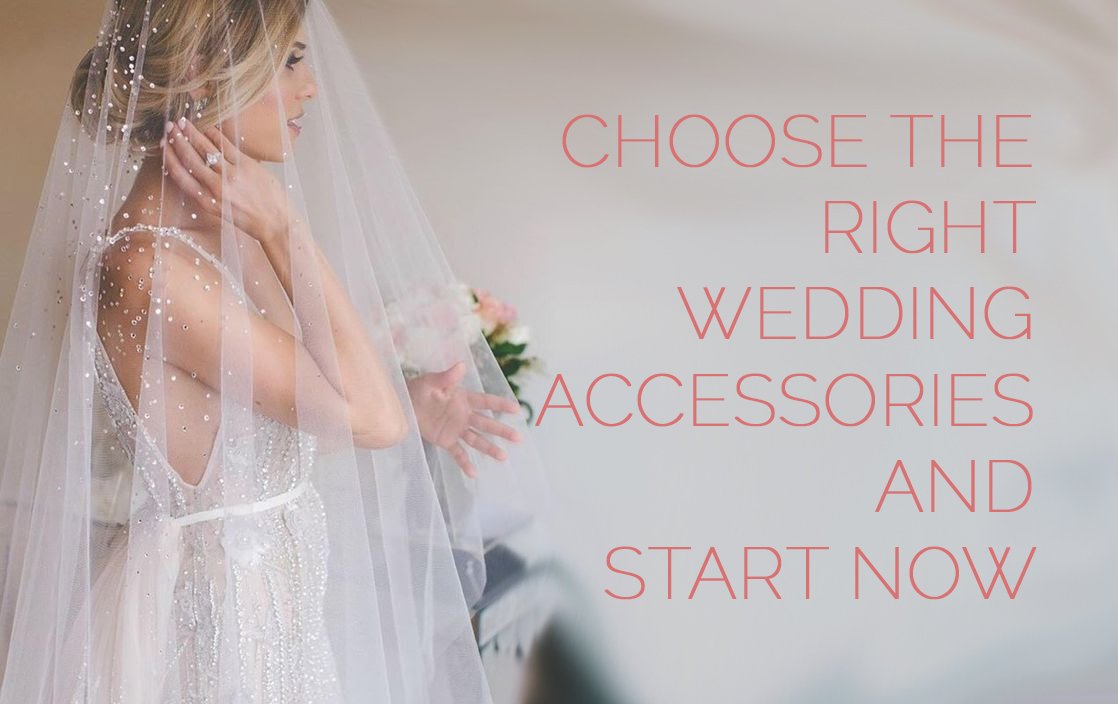
Your wedding vendors are secured, your dress has been chosen and the particulars are slowly starting to fall into place. You breathe a sigh of relief, thinking “this wedding process isn’t so tough after all.” Before you throw your feet up, remember: “the devil is in the details.” As someone with a type A personality, I didn’t struggle to make details a priority; but for the more laid-back bride, you will want to consider how important details such as your wedding accessories are.
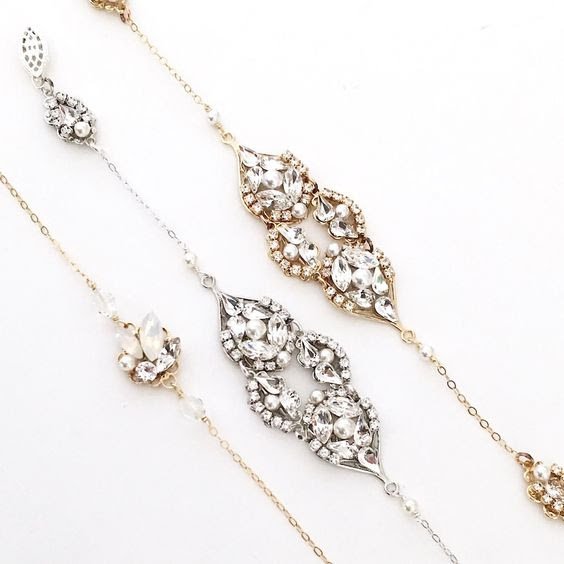
Establish your Metal
Gold? Silver? 9 times out of 10 you choose your dress before anything else and, based on the embellishment of your dress, the metal is decided. If there is no metallic detailing on your dress, then you get to decide! This decision should be a culmination of your personal preference and what best suits your skin tone. As a typical rule of thumb, white is best matched with silver, whereas ivory is best matched with gold. Once you have decided on either gold or silver, be sure to stay consistent. A ‘mishmash’ of metals can become a distraction and nothing should detract from you on your big day!
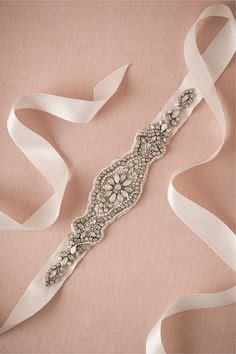
Belt / Sash
Unfortunately, I cannot determine if a belt or sash is necessary for your gown through a blog entry. My best advice is to examine the amount of detailing already on your dress. The key is to determine whether adding a belt or sash accentuates the dress or overpowers it. I will say, the addition of a belt can certainly convey a custom feel without the price tag. Another general rule of thumb is to make sure the belt is no more than 3 inches thick. A belt larger than this can be very unflattering and off-putting. Also, consider the length of your torso! If you have a long torso, wider belts are considered more flattering; if you have a wide torso, thinner belts are more complementary.
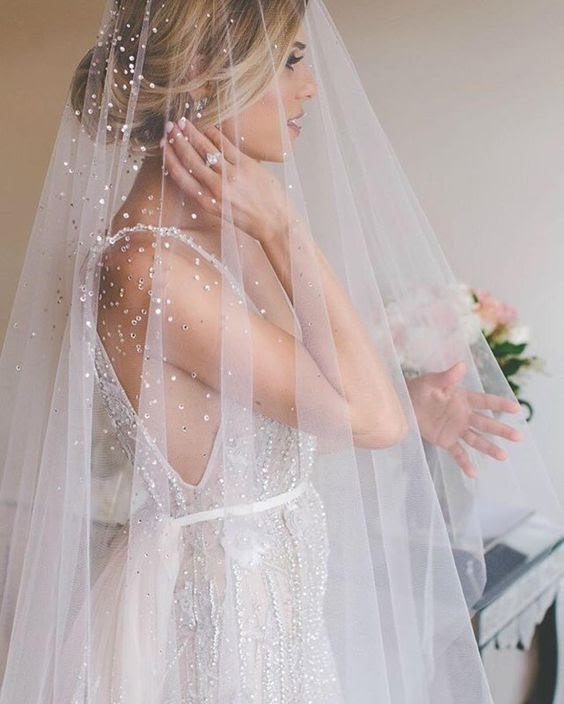
Veil / Hair Accessories
You may choose to wear one, the other, or both! Veils are an iconic accessory that come in a variety of options. Be sure to choose a style, color, and size that complement you and your dress. If your dress has small detailing, go for an ornate veil or vice versa. If you are small in stature, consider a longer veil to elongate your figure. If you are taller, try a mid-length veil to visually break up your length. Lastly, if you are wearing an ivory gown, please wear an ivory veil! Hair accessories can also add an extra wow factor. Be discretionary when choosing hair accessories; remember, less is more!
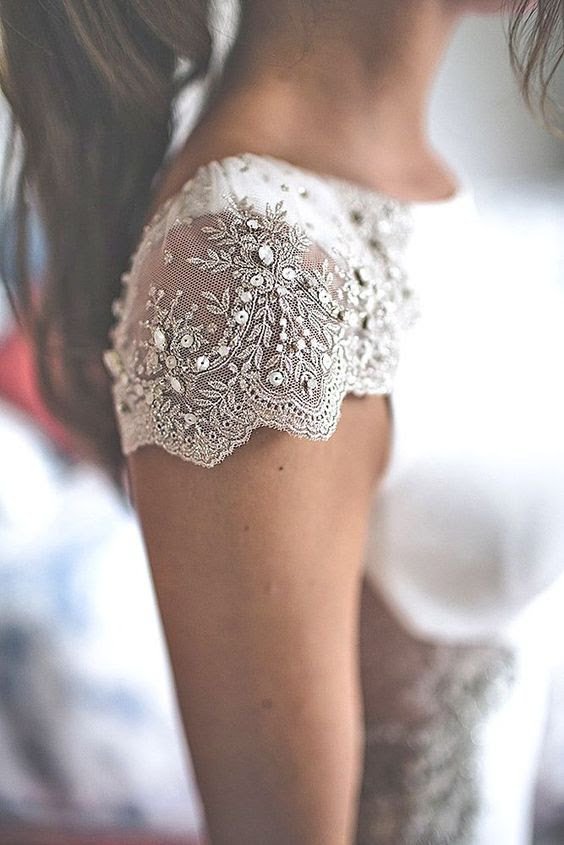
Removeable Sleeves/Straps
Sleeves or straps can be a fantastic way to enhance your bridal gown and this trend is seen more and more on brides lately. On my wedding day, we got married in a Catholic Church and I wanted to make sure that my shoulders were covered. I had my seamstress create a removable cap sleeve overlay that I could remove for the reception. I personally love glam and wanted to switch my look for the reception in an unpretentious, cost-effective way. I accomplished this by removing my embellished sleeve overlay and adding a statement necklace and belt. I LOVED the ability to do this because it gave me a different look for my pictures and allowed me to have a more fun look for the reception. If you have a strapless gown consider the different possibilities of long sleeve, short sleeve, cap sleeve, halter, spaghetti strap, etc.!
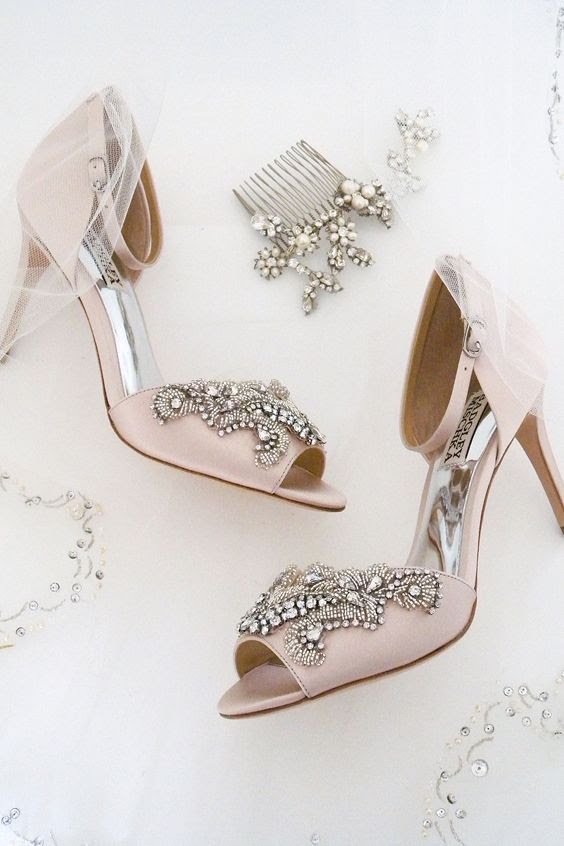
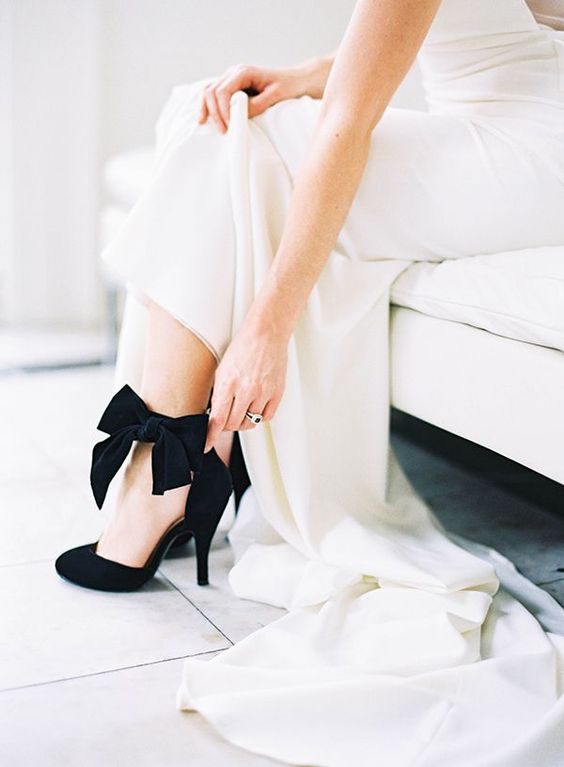
Shoes
Make sure that you choose your shoes before your first fitting! This will allow your dress to be the perfect length. What’s nice about choosing shoes, is that you can pick them before or after your jewelry. In most cases, bridal gowns are floor-length and the shoes only really make a debut in your bridal photos. If there is any metal detailing on your shoes you will want to consider your metallic theme early on, as I explained previously. The most important piece of advice I can give is to choose comfy shoes or make sure you buy two pairs: one pair for the ceremony, and one for the reception where you will be dancing the night away.
Do you understand why you should start looking for bridal accessories NOW? These details play a large roll in your overall look as a bride. This day will be one of the most important days of your life and you will want to look and feel your best. Most of us live busy lives with limited time to ourselves. Deciding these details over time allows you to make it happen. Plenty of other unexpected tasks will come your way; be proactive and you will have time to face them all.
read full post >
Your wedding was magical, the honeymoon was euphoric, and the over looming responsibility of thank you cards is now torturous. The party is over and it’s time to thank your loved ones for their generous gifts. Where do you begin? Lucky for you, I am in the same boat and have come up with an easy and effective game plan.
Create/ Organize Lists
Depending on the size of your wedding, you may have anywhere from 50-200+ wedding thank you cards to write out. Make it easy on yourself and get several lists going. One of these should contain an itemized inventory of gifts that were sent to you. Most companies, such as Bloomingdales, will give you a print-out showing the gift and sender. Your second list should contain an itemization of cash/check gifts. You will create this spreadsheet yourself, preferably in Excel to keep it nice and organized. It especially helpful to compare these two side by side with the attendance roll of everyone invited to the wedding. I found it most helpful to condense my lists, using my wedding-attendee roll to mark off whether they gave money/gift or not. This method allowed me to be positive as to who did or did not attend, whether they gave a gift, and how to correctly word their thank you. The last thing you would want to do is to thank Sally for coming to your wedding and for her awesome gift, only to realize that Sally never made it to your wedding! Stay very, very organized.
Establish Thank you Templates
Let’s face it. If you are writing more than 100+ thank you cards, you are going to want a formula of some sort. This does not make you any less grateful; in fact it just makes you smart. A template will ensure your point comes across clearly while ensuring your time is managed efficiently. Below I have attached sample wedding templates that I found super helpful. These are outsourced from “Apracticalwedding.com:”
Template for when you receive cash gifts:
“Dear Preston and Cristina,
Thank you so much for attending our wedding! We had the best time, and were so happy you were there. We are so appreciative of your generous gift, and look forward to [fusion_builder_container hundred_percent=”yes” overflow=”visible”][fusion_builder_row][fusion_builder_column type=”1_1″ background_position=”left top” background_color=”” border_size=”” border_color=”” border_style=”solid” spacing=”yes” background_image=”” background_repeat=”no-repeat” padding=”” margin_top=”0px” margin_bottom=”0px” class=”” id=”” animation_type=”” animation_speed=”0.3″ animation_direction=”left” hide_on_mobile=”no” center_content=”no” min_height=”none”][adding it to our new car fund, using it to put a down payment on a house, adding it to our honeymoon fund, etc]. Thank you again for joining in the celebration of our marriage.
With gratitude,
Lorelai and Luke”
Template for when you receive non-cash gifts:
“Dear Lexie and Mark,
Thank you for coming to our wedding! It truly would not have been the same without all of our family and friends there. We were so happy to receive [the gift], and we look forward to [options: using it for years to come, having it brighten our home for years to come, cherishing it as a beautiful wedding memento, make toast with it, etc].
With gratitude,
Jesse and Cèline”
Template for attendance only:
“Dear Anthony and Stanford,
Thank you so much for attending our wedding! It was such a delight to see you after all these years. We wanted to take a moment to send you the warmest well wishes and let you know how happy we were to see you there.
With gratitude,
Rory and Logan”
Template for when they send a gift but could not attend the wedding:
“Dear Britney and Christina,
We are so sorry you weren’t able to make it to our wedding. It was a wonderful day, and you were missed. We wanted to make sure we let you know how much we love your gift, and we thank you for sending it.
With gratitude,
Justin and JC”
I found it very helpful to write thank cards to my closest friends first before delving into a more generic template. This got my thoughts flowing and allowed me to loosen up. Check off each person as you go to make sure no one is forgotten. Also, remember that the templates are there as a guide; you don’t have to write each thank you verbatim. This would only make your thank you writing task that much more daunting.
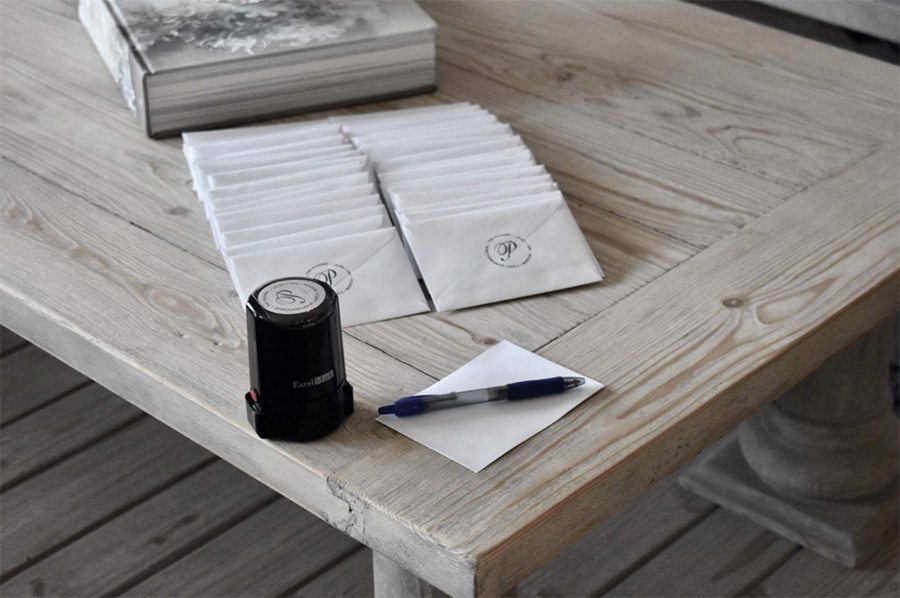
Addresses and Postage
You’ve finally completed all of your thank you acknowledgements and now have come to the realization that you have to write out every name and address as well as your return information! Yup, I did too. There are a few ways to go about addressing the people you are thanking. You can print out labels, you can handwrite, or you can hire a calligrapher. I went the handwritten route, but it is completely your preference. For my husband and my return information we had a stamp made. This tool saved time as well as my sanity. Once you have completed addressing your envelopes, you simply have to stamp!
I hope this blog was helpful to you! Wedding tasks that seem easy to accomplish can sometimes end up becoming gruesome to execute. What do I say? How do I do this effectively? How do I do this in the most efficient way? At the end of the day, saying thank you isn’t the hard part; the writing of hundreds of thank you cards is. [/fusion_builder_column][/fusion_builder_row][/fusion_builder_container]
read full post >
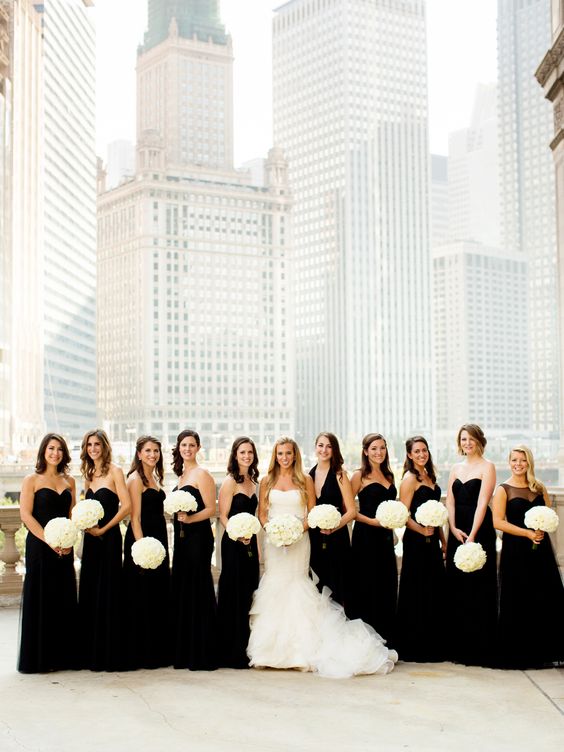
When it comes to planning a wedding there are so many decisions! One of the first and most important choices you will make is your wedding theme.
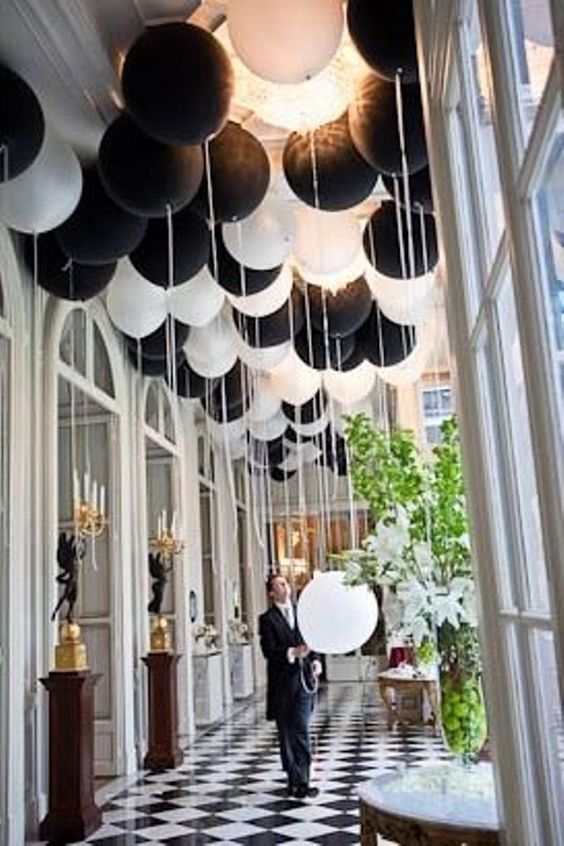
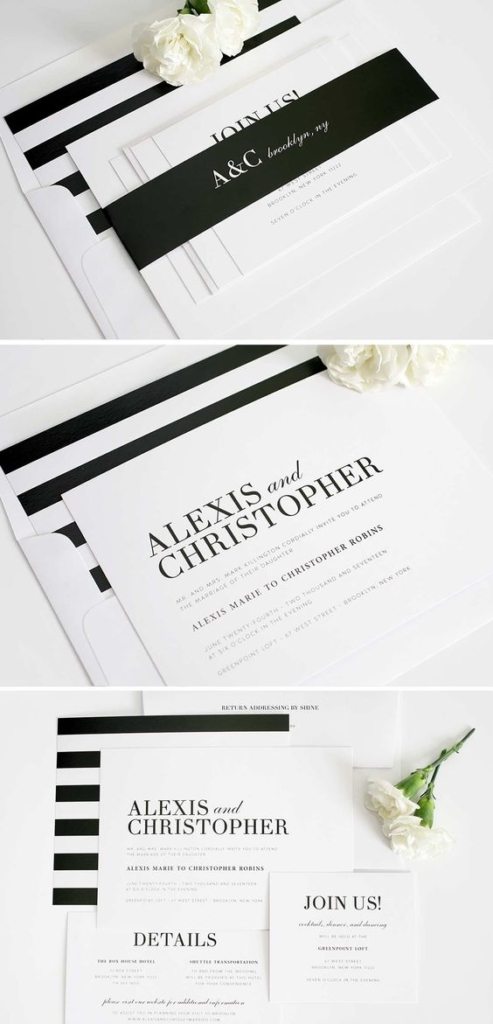
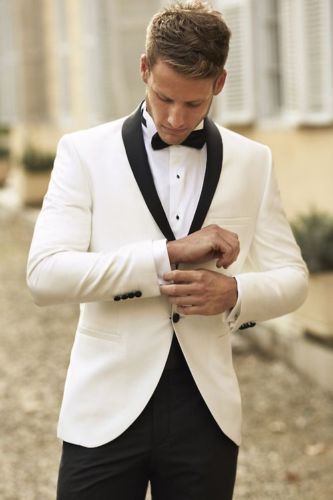
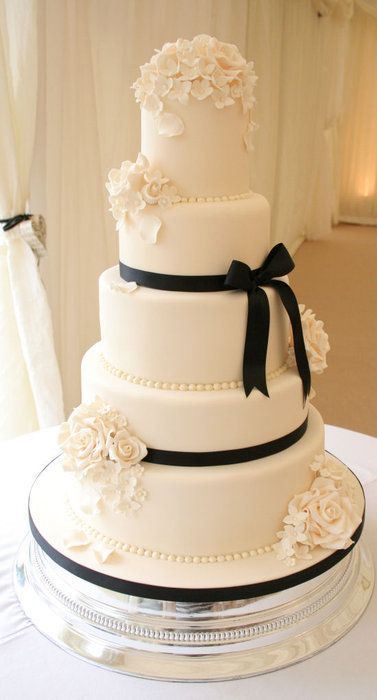
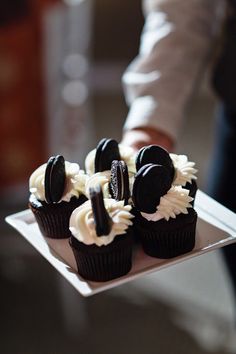
Year to year wedding trends change, but a classic black and white wedding exudes simplicity with a timeless, elegant feel. In fact, it can be executed in a multitude of ways!
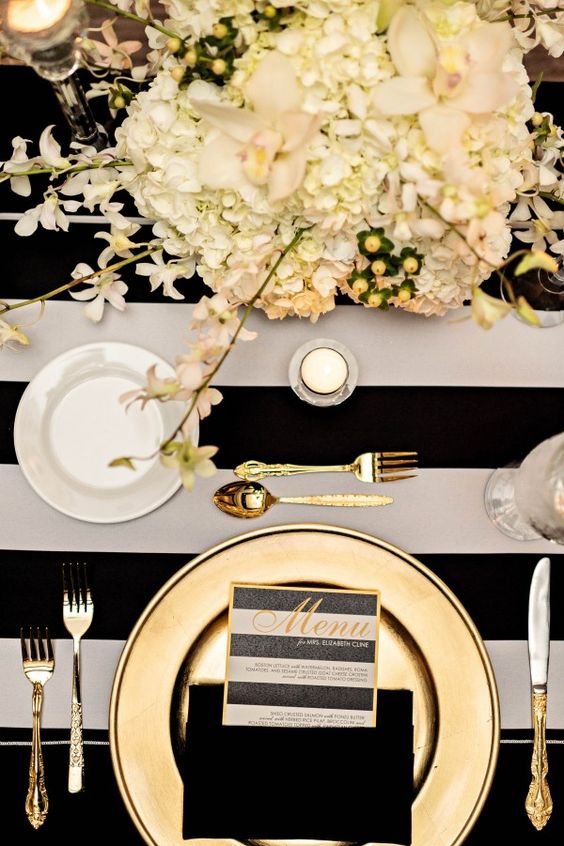
You are probably thinking to yourself, “Why would I choose black and white?” Well, a black and white color scheme reflects sophistication and is fun, contemporary and clean.
In fact, this is a theme that has been around for years and never really left.
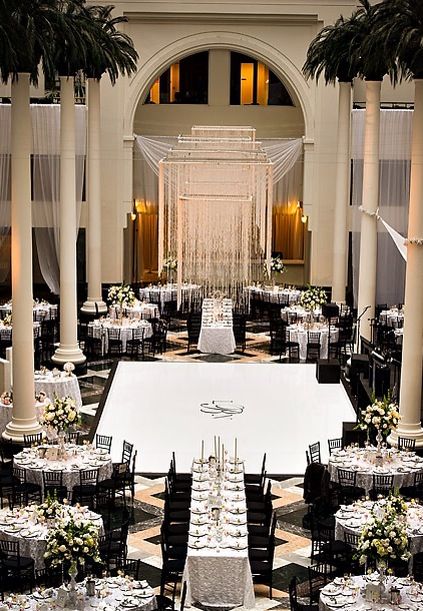
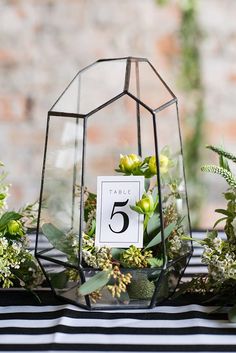
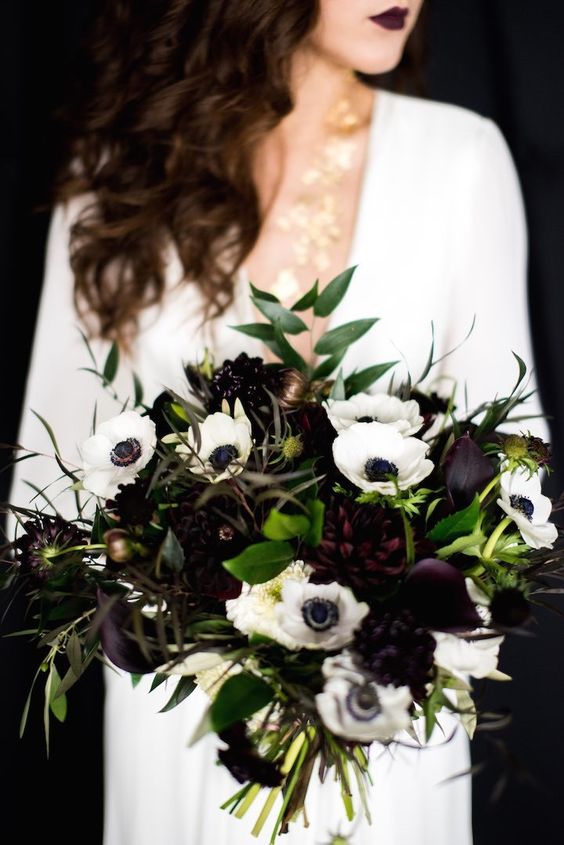
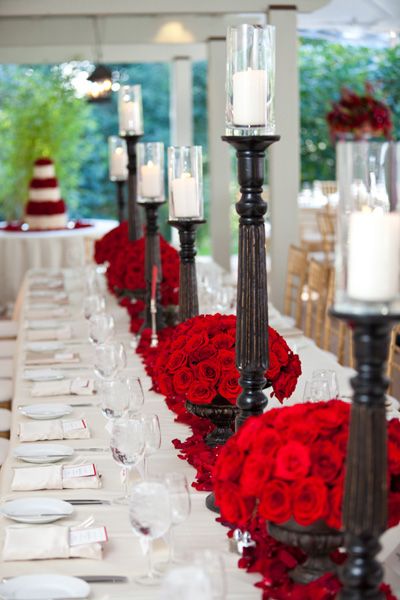
I predict this trend will come back in a really big, great way! The manipulation of black and white can be used in invitations, dress code, table décor, photos, flowers, or all of the above.

Planning a black and white wedding can be fun, but it is important to do it tastefully.

When going for this look keep it simple and chic by skipping accent colors aside from shimmer.
If you’re insistent on some sort of color pop, red is the most complimentary and can be incorporated through roses in the table arrangements.
read full post >
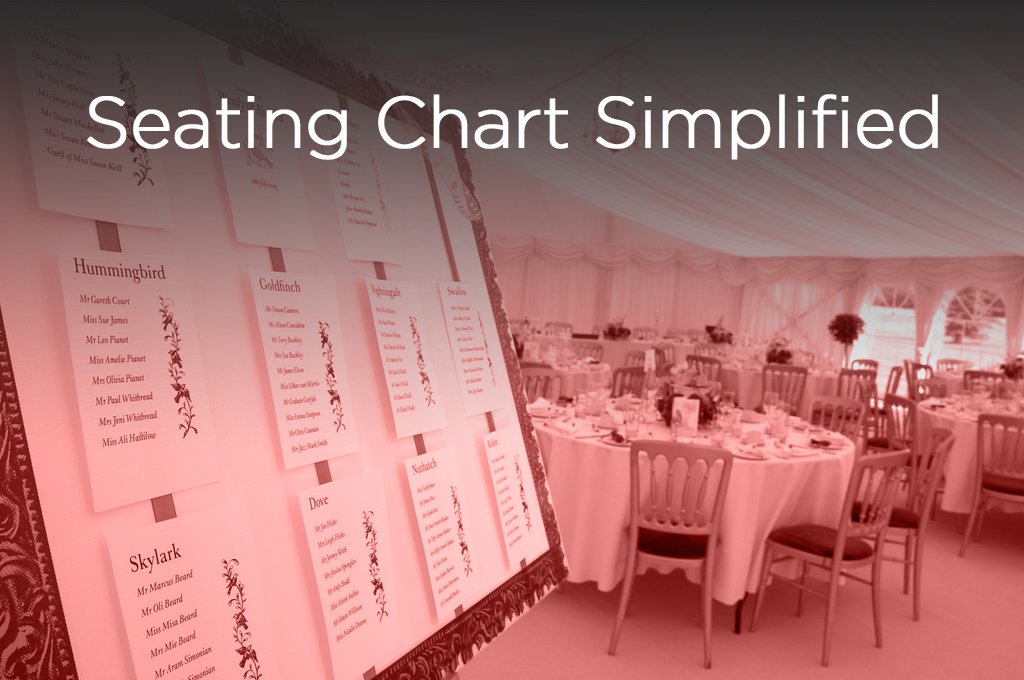
I truly enjoy writing these Lady Luxe Blogs because a majority of them stem from firsthand experiences. Being a bride to be has allowed me to figure out the “how tos” of the wedding process and then simplify and share with you. As a bride, your nuptials are often your first debut in the wedding world. Everything seems overwhelming and new because it is! Just as you are nearing the final month of the planning process, you will find that you have to conquer yet another task that you know little to nothing about. The seating chart! For some of you, this may come easy, whereas others may be mystified. As someone who was more unsure than not, I will gladly break it down for you!
First, how many people are attending your wedding? For the sake of explanation, I am going to pretend you have 120 people coming. With 120 in attendance you will want to decide how many people will be seated at each table. Before you simply throw a number out there, examine your reception space. Based on the square footage of your venue, you may opt for more or less table—depending upon square footage. For example, if your reception room is approximately 5,000 square feet with 120 people, you may opt for tables of 8 to 10. This will allow the room to look full but not overcrowded.
Another important tidbit to keep in mind is that the more tables you have, the more floral arrangements you will need. It is important to make sure you are staying within your budget. The layout is yet another important factor to consider. Is there a giant statue in the middle of the room? Or, is the room an open layout? Factors such as these may change how many tables you want. Your final table number count should derive from your layout, square footage, and budget.
Once you have decided on the amount of guests at each table, you will ultimately want to decide the optimal seating arrangement. I found this task to be rather daunting at first and decided to start with our family. I Googled “best ways to seat family,” only to really find that the traditional method is to either to do a head table or to seat the parents, grandparents, and officiant together. In our case, our grandparents will not be in attendance and we do not have a close relationship with our officiant. So, I decided to write down both of our immediate families and see how we could best seat everyone. We decided early on that we would do tables of 10. Due to my fiancé’s family being larger, we were unable to fit immediate family all at one table. We decided instead to seat all of our brothers, sisters and significant others at one table, our aunts and uncles at another table, and our parents, god- parents and closest friends at their own table. There is no science in deciding how family should be seated; it is strictly preference and what works best.
Next, “Where do I seat the rest of my guests?” Rather than becoming overwhelmed by this task, do yourself a favor and start jotting down the names of people and friends you know would like to sit together. Simplify things by putting each set of parents in charge of grouping their guests as you take care of yours. Do your best to make as much sense as you can in grouping, but understand this will never be perfect. We’ve all attended one wedding or another where we haven’t known who we are sitting next to and guess what? That’s perfectly fine! Do your best to sit guests next to friends and family and to those whom you think they may get along with best.
Ok, so now you have your groups of people together but can’t decide exactly where they should be placed throughout the room. As rule of thumb, bridesmaids, groomsmen and family are typically closest to the bride and groom. Unless you are doing a head table, you will want to place them in the tables nearest you. If you have elderly guests attending, try to avoid seating them right next to the band or DJ. Also, seat guests in a way that will promote dancing. Lets face it, some people will be the life of the party and others not so much. Sit guests in a way that will encourage them to let loose and have fun!
I hope this helps you in your seating chart process. Understand this is an art, not a science! Consult friends and family who have also had to plan seating and ask them for their help. Best of luck!
read full post >


Bridal + Entourage Hairstyling


